转载自:http://krams915.blogspot.com/2011/01/ldap-apache-directory-studio-basic.html
LDAP - Apache Directory Studio: A Basic Tutorial
In this tutorial we will setup a basic LDAP structure containing users and roles. We will be using the excellent Apache Directory Studio IDE. This tutorial will be the basis for our other Spring LDAP integration tutorials.
What is Apache Directory Studio?
The Eclipse based LDAP browser and directory client
Apache Directory Studio is a complete directory tooling platform intended to be used with any LDAP server however it is particularly designed for use with ApacheDS. It is an Eclipse RCP application, composed of several Eclipse (OSGi) plugins, that can be easily upgraded with additional ones. These plugins can even run within Eclipse itself.
Source: http://directory.apache.org/studio/
What is LDAP?
The Lightweight Directory Access Protocol (LDAP) is an application protocol for reading and editing directories over an IP network. A directory is an organized set of records. For example, the telephone directory is an alphabetical list of persons and organizations, with each record having an address and phone number. A directory information tree often follows political, geographic, or organizational boundaries. LDAP directories often use Domain Name System (DNS) names for the highest levels. Deeper inside the directory might appear entries for people, departments, teams, printers, and documents.
Source: http://en.wikipedia.org/wiki/LDAP
If this is your first time to LDAP, you might be wondering how is this different from an RDBMS. I suggest my readers to visit the following article Should I Use a Directory, a Database, or Both?
A Brief Background
We have a small startup company named Mojo Enterprises. We have four people, and two of them are admins. Our task is to create a hierarchical structure of our organization using LDAP because we anticipate the eventual growth of the company. We may have hundreds of people from different departments in five years time. Each has their own information and structure. These information and structure will be shared among different applications of the company. LDAP is a good protocol to meet all these requirements.
Layout the Structure
Let's define the important elements of the company.
Company Name: Mojo Enterprises
Members:
- Hugo Williams
- John Keats
- John Milton
- Robert Browning
Admins:
- Hugo Williams
- John Keats
LDAP is a hierarchical tree structure, so our design will be influenced by that.
We need to assign the topmost parent of our structure. Logically, the name of the company fits that requirement. We'll pick the name mojo as the topmost parent.
Under the mojo we will assign our members. There are many ways to organize our members. We can organize them by gender, by job function, and etc. For this tutorial we'll organize them based on identity and roles. We'll put all the identities of each person in a separate element, while the roles will be placed on another element.
Under the roles we have two sub-divisions. Remember we have the regular users and the admins. What we'll do is divide the roles into elements.
Here's how our structure would like:
mojo
 |
 |--roles
 |    |
 |    |--admin
 |    |--regular
 |
 |--identities
      |
      |--guy1
      |--guy2
      |--guy3
      |--guy4
We'll make the names a little bit formal, and make it conform with the naming convention of LDAP. For the topmost parent, we'll retain mojo. For roles, we'll use groups instead. For identities, we'll use users
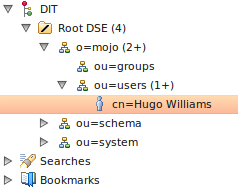
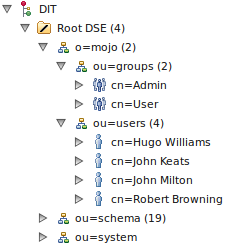
When we're done with this tutorial, we should have the following structure:

It's really simple to do. All you need is an Apache Directory Studio, this tutorial, and patience.
Install the Apache Directory Studio
Before we can do any LDAP-related work, we need to have an IDE first. Although it's not required, we'll require it for this tutorial. And why not? It's free anyway.
To install the Apache Directory Studio, visit the following link http://directory.apache.org/studio/downloads.html Follow the instructions on that link
for the installation steps.
Create a New Server
Once you have installed the studio, we need to create a server. Here are the steps:
1. Open Apache Directory Studio.
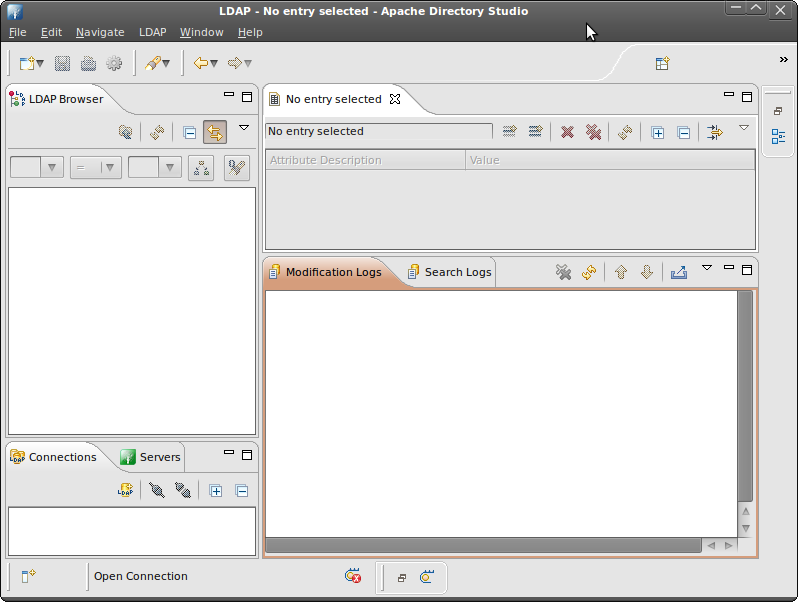
3. Go to File, and click New. A popup window will open.
4. Expand the Apache DS folder, and select the Apache DS Server
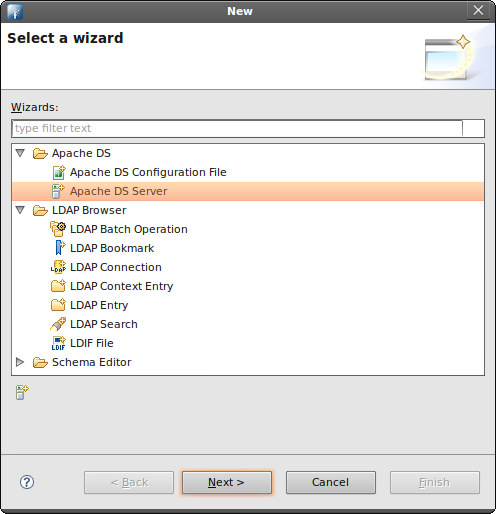
5. Click Next.
6. Type-in any name for the server. For example, apache-ds-server
7. Click Finish.
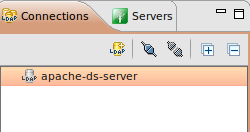
8. A new server has been added on your Servers panel.
If you can't see the Servers panel, go the menu bar then click Window > Show View > Apache DS > Servers
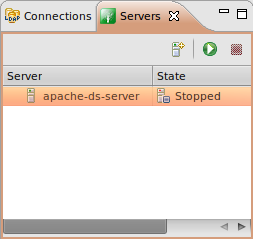
9. Select your server, then click the Run button.
Your server should now be running.
Create a Connection
To browse the contents of the server, we need to create a connection. Here are the steps:
1. Right-click on your server.
2. Select LDAP Browser
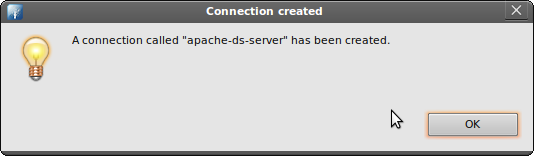
3. Select Create a Connection. An alert message will popup indicating the a new connection has been created.
4. Go to the Connections panel.
If you can't see the Connections panel, go the menu bar then click Window > Show View > LDAP Browser > Connections
5. Double-click the name of the new connection you've created earlier.
6. The LDAP Browser panel should refresh and show the contents of the server.
Notice the topmost entry of this server is DIT, followed by the Root DSE.
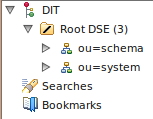
7. Expand the Root DSE folder. There are two sub-entries: ou=schema and ou=system.
These are partitions in the server. Do not modify them unless you know what you're doing.
Create a New Partition
To add our company to the root tree, we need to create a new partition. Everything related to the company will be attached to this new partition. Here are the steps:
1. Go to the Servers panel, and right-click your server.
2. Select Open Configuration. A server.xml editor will appear on the main panel.
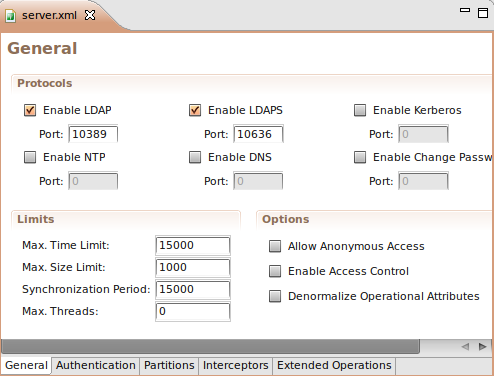
3. At the bottom part of server.xml, there are five tabs. Click the Partitions tab.
The Partitions tab should appear.
4. Click on Add and enter the following details for this new partition.
ID: mojo
Cache Size: 100
Suffix: o=mojo
5. Save your changes (CTRL + S). A new partition has been added.

6. Restart your Apache DS server.
7. Refresh the LDAP Browser panel.
8. Click on the Root DSE folder. A new editor will open containing the details of this folder.
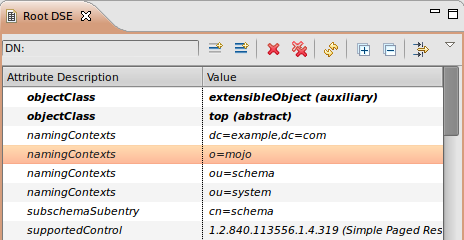
Notice the namingContexts attribute. The namingContexts o=mojo shows in the lists. However it doesn't show under the Root DSE tree because we need to add the organization manually in the tree.
Add the Parent Organization
Our company is an organization. In LDAP, to represent a company we use the organization object which is represented by the alias o. So if our company's name is mojo, the Distinguished Name (dn) of the company is o=mojo. It's a naming convention. (The Distinguished Name is like the primary key or primary identity).
To create the organization object, follow the steps below:
1. Right-click on the Root DSE folder. Select New. Select New Context Entry
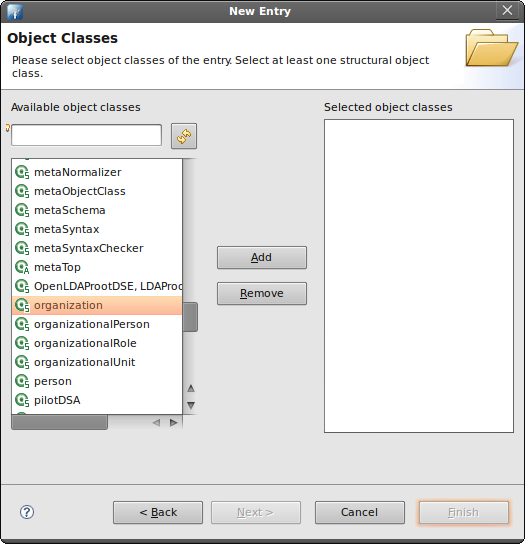
2. Select Create entry from scratch. Click Next. The Object classes window will appear.
3. Find the organization object. Select it then click Add
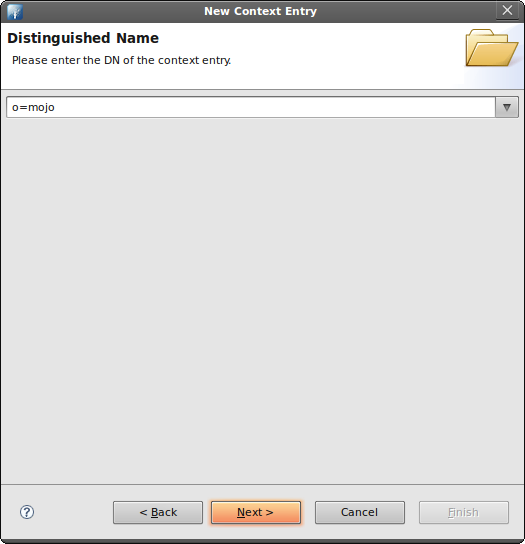
4. Click Next. Now you need to enter a Distinguished Name (dn). Click on the pulldown menu. Select o=mojo.
5. Click Next. The Attributes window will appear. Examine the values.
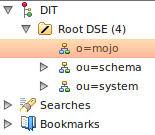
6. Click Finish. Notice the new partition now appears under the Root DSE.
Add the Organizational Units
Earlier we mentioned we'll structure our company based on users (contains personal information of the user) and groups (contains the authorization level of each person).
Both of these represent an organizational unit.
In LDAP, to represent an organizational unit we use the organizationalUnit object which is represented by the alias ou. So if we have a unit name users, the Distinguished Name (dn) is ou=users,o=mojo. Why is there an o=mojo? It's a naming convention. The same convention applies to groups. The Distinguished Name (dn) is ou=users,o=mojo. This can be likened the way we name URLS. For example, users.mojo.com or groups.mojo.com.
We'll add first the users unit. Here are the steps:
1. Go to the LDAP Browser panel. Expand the Root DSE folder.
2. Right-click the o=mojo entry. Select New. Select New Entry.
The Entry Creation Method window will appear.
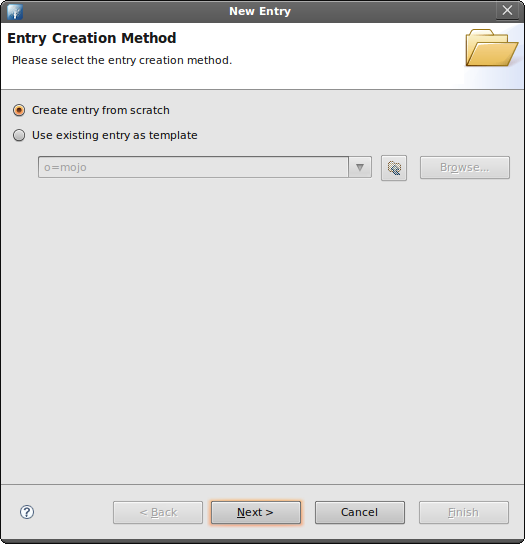
3. Select Create entry from scratch. Click Next. The Object Classes window will appear.
4. Find the organizationalUnit object. Select it then click Add.
5. Click Next. Now you need to enter a Distinguished Name (dn).
The Parent field should read o=mojo.

On the RDN field enter ou. On the value field enter users. The DN Preview should read ou=users,o=mojo
6. Click Next. The Attributes window will appear. Examine the values.
7. Click Finish. We've just created the ou=users organizational unit.

Add the Second Organizational Units
We've just added the ou=users organizational unit. We need to add the organizational unit for groups as well. We'll follow the same steps.
1. Go to the LDAP Browser panel. Expand the Root DSE folder.
2. Right-click the o=mojo entry. Select New. Select New Entry.
The Entry Creation Method window will appear.
3. Select Create entry from scratch. Click Next. The Object Classes window will appear.
4. Find the organizationalUnit object. Select it then click Add.
5. Click Next. Now you need to enter a Distinguished Name (dn).
The Parent field should read o=mojo.

On the RDN field enter ou. On the value field enter groups. The DN Preview should read ou=groups,o=mojo
6. Click Next. The Attributes window will appear. Examine the values.
7. Click Finish. We've just created the ou=groups organizational unit.
Add the Staff
Now we need to add our four people:
- Hugo Williams
- John Keats
- John Milton
- Robert Browning
Admins:
- Hugo Williams
- John Keats
We'll place their personal information under the ou=users; whereas we'll place their authorization levels under the ou=groups.
Let's start with the ou=users. We'll be adding four persons. We'll represent each person using the inetOrgPerson object.
What's an inetOrgPerson object?
The inetOrgPerson object class is a general purpose object class that
holds attributes about people. The attributes it holds were chosen
to accommodate information requirements found in typical Internet and
Intranet directory service deployments.
Source: http://www.faqs.org/rfcs/rfc2798.html
An inetOrgPerson can contain a user id (uid) and password (userPassword) which will be useful later for authenticating users from using LDAP.
Here are the steps we need to do:
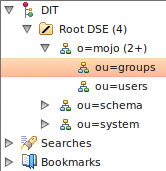
1. Go to the LDAP Browser panel. Expand the Root DSE folder.
2. Expand the o=mojo entry.
3. Right-click the ou=users entry. Select New. Select New Entry.
The Entry Creation Method window will appear.
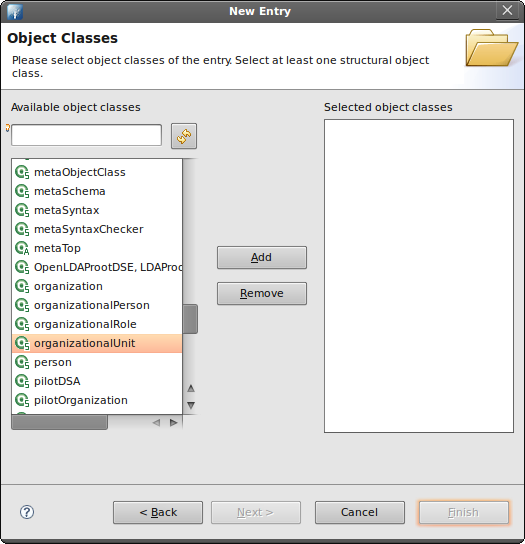
4. Select Create entry from scratch. Click Next. The Object Classes window will appear.
5. Find inetOrgPerson object. Select it then click Add.

6. Click Next. Now you need to enter a Distinguished Name (dn).
The Parent field should read ou=users,o=mojo.
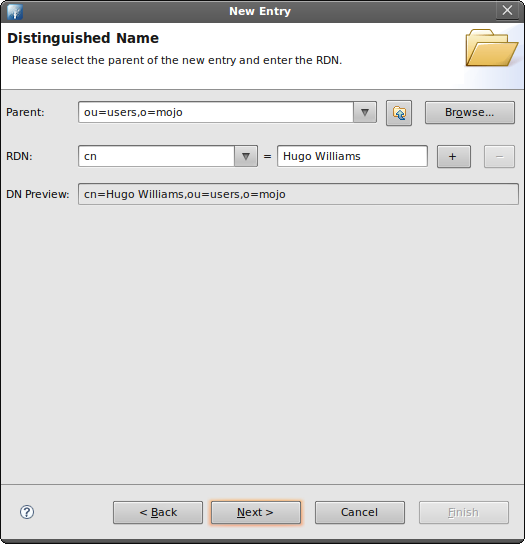
On the RDN field enter cn. On the value field enter Hugo Williams.
The DN Preview should read cn=Hugo Williams,ou=users,o=mojo (cn represent Common Name).
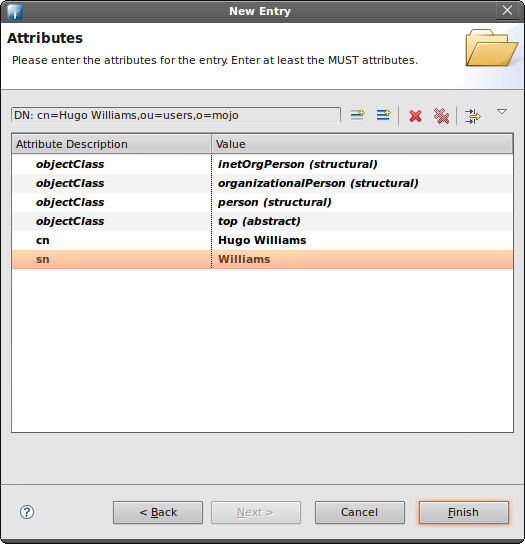
7. Click Next. The Attributes window will appear. Examine the values.
8. Under the sn attribute, enter Williams (sn stands for Surname)
9. We need to add a username for this user. Right-click on the same window. Select New Attribute. The Attribute Type window will appear.
10. On the Attribute type field, enter uid. This will serve as the username of the person.
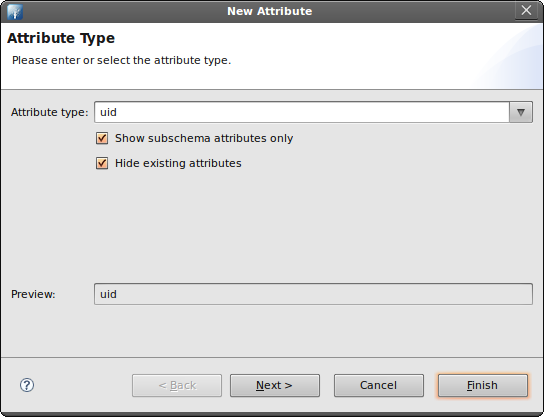
11. Click Next, then click Finish.
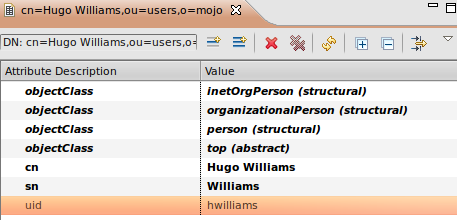
12. You're back on the Attributes window. On the uid attribute value, enter hwilliams
13. We need to add a password for this user. Right-click on the same window. Select New Attribute. The Attribute Type window will appear.
14. On the Attribute type field, enter userPassword. This will serve as the password of the person.
15. Click Next, then click Finish.
16. You will be asked to enter a password. Enter pass as the new password. Make sure that the Select Hash Method is set to Plaintext
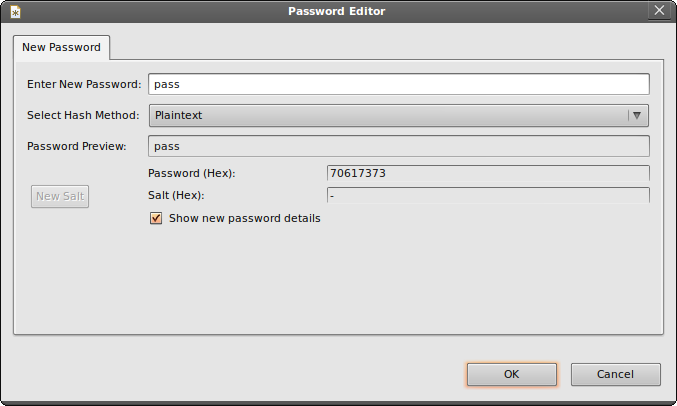
17. Click OK.
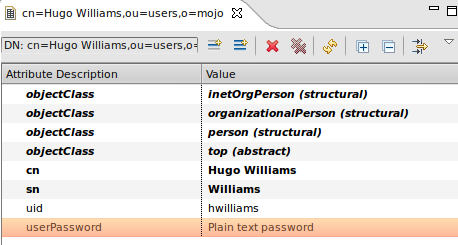
A new entry has been added under the ou=users. The new entry is cn=Hugo Williams.
Now we need to add the remaining three users. In order to do that, just repeat the same steps earlier. Here are the details of the three remaining users.
Name: John Keats
uid: jkeats
userPassword: pass

Name: John Milton
uid: jmilton
userPassword: pass

Name: Robert Browning
uid: rbrowning
userPassword: pass
Add the Authorization Levels
We have added the personal information, as well as the usernames and passwords, for each person under the ou=users. Now, we will be adding the authorization level for each of these persons.
We'll add them under ou=groups. We'll use the groupOfUniqueNames object to represent each role.
Let's add the User role first.
1. Go to the LDAP Browser panel. Expand the Root DSE folder.
2. Expand the o=mojo entry.
3. Right-click the ou=groups entry. Select New. Select New Entry.
The Entry Creation Method window will appear.
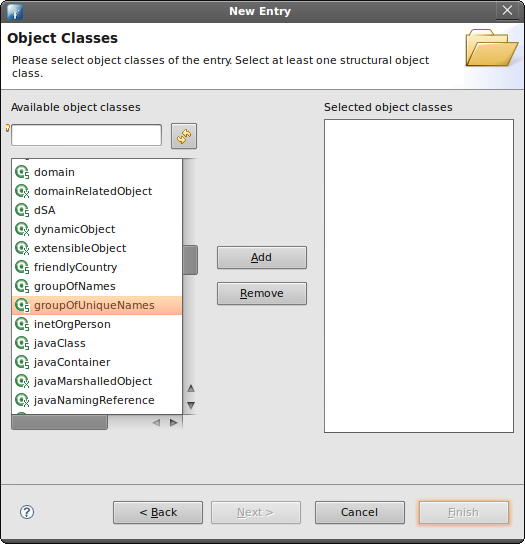
4. Select Create entry from scratch. Click Next. The Object Classes window will appear.
5. Find the groupOfUniqueNames object. Select it then click Add.
6. Click Next. Now you need to enter a Distinguished Name (dn).
The Parent field should read ou=groups,o=mojo.
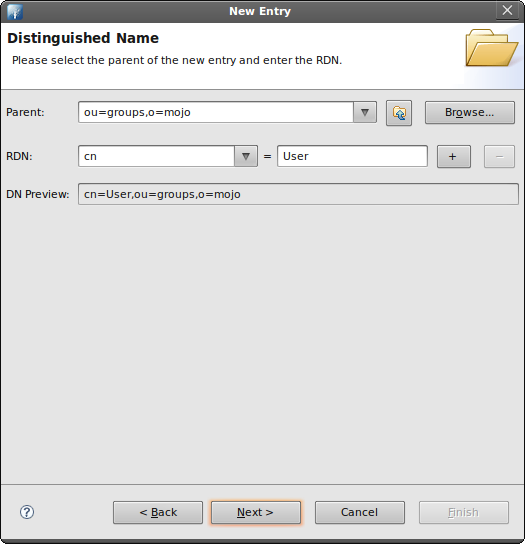
On the RDN field enter cn. On the value field enter User
The DN Preview should read cn=User,ou=groups,o=mojo
8. Click Next. The Attributes window will appear. Examine the values.
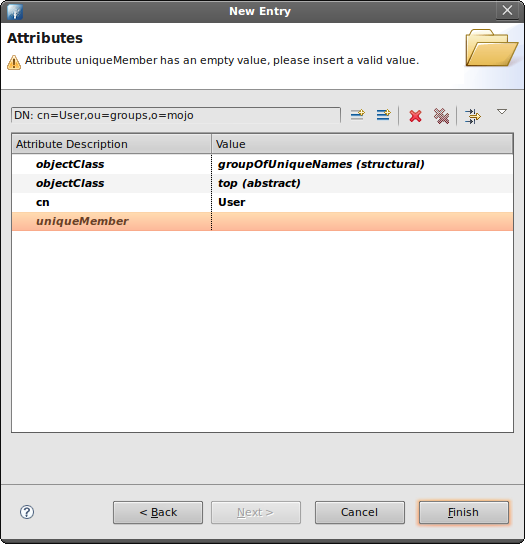
Notice there's a uniqueMember attribute. We'll be placing the Distinguished Name (dn) of our users in this entry. One uniqueMember attribute will represents one user. This means we need to add three more uniqueMember attributes for a total of four uniqueMember attributes.
9. Right-click on the same window. Select New Attribute. The Attribute Type window will appear.
10. On the Attribute type field, enter uniqueMember.
11. Click Next, then click Finish.
12. We're back on the Attributes window. We need to add two more uniqueMembers (for a total of four uniqueMembers). Repeat the same steps for adding an attribute.
13. Now we need to fill-in the values for these attributes. In each entry add the dn of each user. Here are the Distinguished Name for each user.
cn=Hugo Williams,ou=users,o=mojo
cn=John Keats,ou=users,o=mojo
cn=John Milton,ou=users,o=mojo
cn=Robert Browning,ou=users,o=mojo
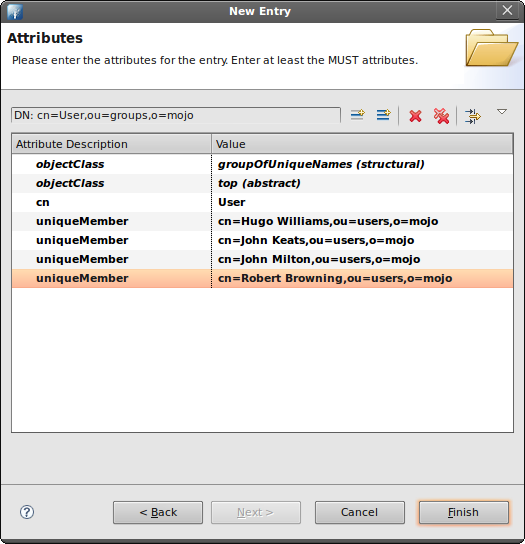
14. Click Finish when you're done.
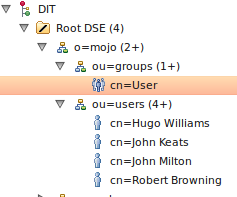
A new entry has been added under the ou=groups. The new entry is cn=User
Now we need another entry for the Admin role. We'll repeat the same steps.
1. Go to the LDAP Browser panel. Expand the Root DSE folder.
2. Expand the o=mojo entry.
3. Right-click the ou=groups entry. Select New. Select New Entry.
The Entry Creation Method window will appear.
4. Select Create entry from scratch. Click Next. The Object Classes window will appear.
5. Find the groupOfUniqueNames object. Select it then click Add.

6. Click Next. Now you need to enter a Distinguished Name (dn).
The Parent field should read ou=groups,o=mojo.
On the RDN field enter cn. On the value field enter Admin
The DN Preview should read cn=Admin,ou=groups,o=mojo
7. Click Next. The Attributes window will appear. Examine the values.
Notice there's a uniqueMember attribute. We'll be placing the Distinguished Name (dn) of our users in this entry. One uniqueMember attribute will represent one user. This means we need to add one more uniqueMember attributes for a total of two uniqueMember attributes.
8. Right-click on the same window. Select New Attribute. The Attribute Type window will appear.
9. On the Attribute type field, enter uniqueMember.
10. Click Next, then click Finish.
11. We're back on the Attributes window. We need to add one more uniqueMembers (for a total of two uniqueMembers). Repeat the same steps for adding an attribute.
12. Now we need to fill-in the values for these attributes. In each entry add the dn of each user. Here are the Distinguished Name for each user.
cn=Hugo Williams,ou=users,o=mojo
cn=John Keats,ou=users,o=mojo
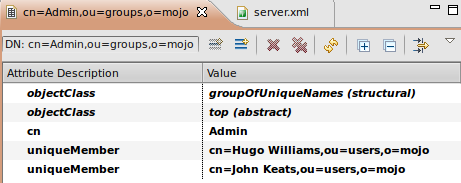
13. Click Finish when you're done.
A new entry has been added under the ou=groups. The new entry is cn=Admin
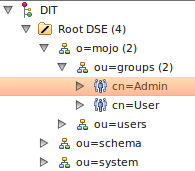
Here's the final structure:
Exporting the Data
If you need to backup your data or replicate the information in your LDAP, you can export the data. When the data is exported, it's saved in LDIF format. This format is actually a human-readable file. Here's the LDIF for this tutorial:
version: 1

dn: o=mojo
objectClass: organization
objectClass: extensibleObject
objectClass: top
o: mojo

dn: ou=users,o=mojo
objectClass: extensibleObject
objectClass: organizationalUnit
objectClass: top
ou: users

dn: ou=groups,o=mojo
objectClass: extensibleObject
objectClass: organizationalUnit
objectClass: top
ou: groups

dn: cn=User,ou=groups,o=mojo
objectClass: groupOfUniqueNames
objectClass: top
cn: User
uniqueMember: cn=John Milton,ou=users,o=mojo
uniqueMember: cn=Robert Browning,ou=users,o=mojo
uniqueMember: cn=Hugo Williams,ou=users,o=mojo
uniqueMember: cn=John Keats,ou=users,o=mojo

dn: cn=Admin,ou=groups,o=mojo
objectClass: groupOfUniqueNames
objectClass: top
cn: Admin
uniqueMember: cn=Hugo Williams,ou=users,o=mojo
uniqueMember: cn=John Keats,ou=users,o=mojo

dn: cn=Robert Browning,ou=users,o=mojo
objectClass: organizationalPerson
objectClass: person
objectClass: inetOrgPerson
objectClass: top
cn: Robert Browning
sn: Browning
uid: rbrowning
userPassword:: cGFzcw==

dn: cn=John Keats,ou=users,o=mojo
objectClass: organizationalPerson
objectClass: person
objectClass: inetOrgPerson
objectClass: top
cn: John Keats
sn: Keats
uid: jkeats
userPassword:: cGFzcw==

dn: cn=Hugo Williams,ou=users,o=mojo
objectClass: organizationalPerson
objectClass: person
objectClass: inetOrgPerson
objectClass: top
cn: Hugo Williams
sn: Williams
uid: hwilliams
userPassword:: cGFzcw==

dn: cn=John Milton,ou=users,o=mojo
objectClass: organizationalPerson
objectClass: person
objectClass: inetOrgPerson
objectClass: top
cn: John Milton
sn: Milton
uid: jmilton
userPassword:: cGFzcw==
That's it. We've managed to setup our basic LDAP structure using Apache Directory Studio. We've also covered some of the popular LDAP objects.